This guide describes how to configure Single Sign-On (SSO) between Lative and Okta using the Lative application available in the Okta Integration Network (OIN).
Overview
The Lative Okta integration enables users to sign in to Lative using their Okta credentials through OpenID Connect (OIDC).
Because the integration is available directly through the Okta Integration Network, the application comes preconfigured with the required OpenID Connect settings and redirect URIs. This simplifies setup and helps reduce manual configuration errors compared to creating a custom Okta application.
Prerequisites
Before configuring Okta Single Sign-On (SSO) with Lative, ensure that you have:
- A Lative account with administrator privileges
- An Okta administrator account
- Access to create and configure applications in your Okta organization
- A verified email domain in Lative for the users who will authenticate through Okta
Supported Features
The Lative Okta integration supports the following features:
- SP-Initiated Single Sign-On (SSO)
- IdP-Initiated Single Sign-On (SSO)
- Just-In-Time (JIT) User Provisioning (if supported by your implementation)
Supported SSO Protocol:
- OpenID Connect
The integration enables secure authentication through Okta while allowing organizations to centrally manage user access policies and multi-factor authentication (MFA).
Configuration Steps
Step 1 – Add the Lative Application
- Sign in to your Okta Admin Console.
- Navigate to Applications → Applications.
- Click Browse App Catalog.
- Search for Lative.
- Select the Lative application.
- Click Add Integration.
- Enter an application label if desired.
- Click Done.
Okta will automatically create a preconfigured OpenID Connect application for your organization.
At this stage, the application has been added to your Okta environment but users will not yet have access until assignments have been configured.
Step 2 – Enter your Lative Tenant ID
Configure the Tenant ID
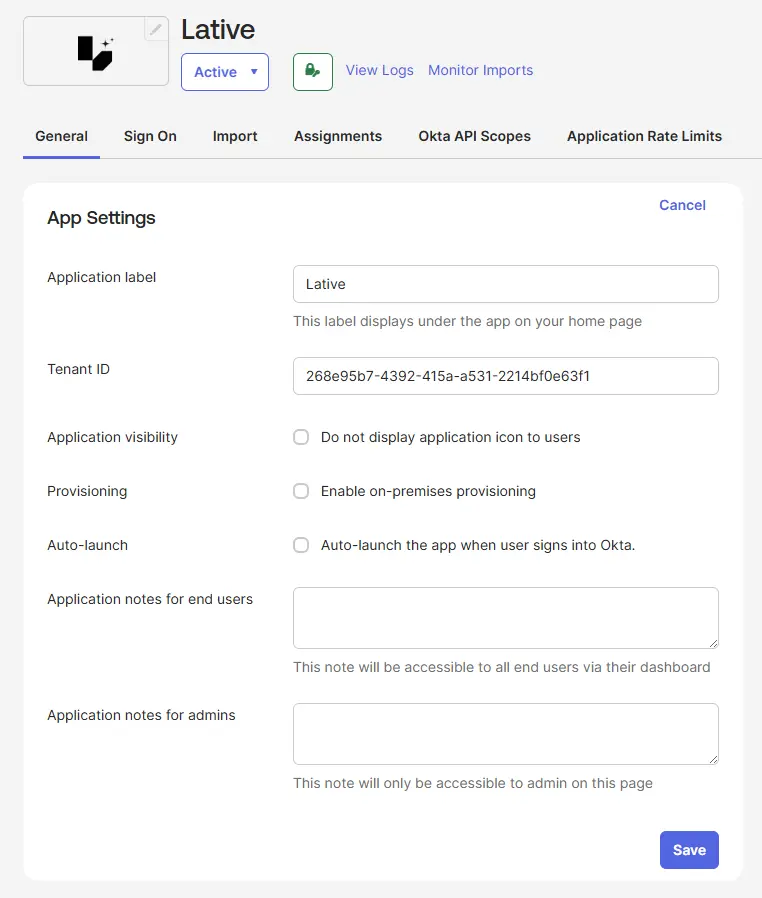
After adding the Lative application from the Okta Integration Network, navigate to the General tab of the application settings.
Locate the Tenant ID field and enter the Tenant ID provided by your Lative workspace administrator. This value uniquely identifies your Lative tenant and is required for the integration to function correctly.
If you don’t know your Tenant ID, contact the Lative team or retrieve it from your Lative workspace settings.
Example:
In the Okta application settings, paste the Tenant ID provided by Lative into the Tenant ID field and click
Step 3 – Configure Access
- Open the newly created Lative application.
- Navigate to the Assignments tab.
- Assign the users or groups that should have access to Lative.
Only users assigned to the application will be able to authenticate through Okta and access Lative.
Step 4 – Obtain the Required Configuration Values
Open the General tab of the Lative application.
Record the following values:
Client ID
Located in:
General → Client Credentials
Client Secret
Located in:
General → Client Credentials → Client Secrets
Okta Domain
Your Okta domain is the base URL of your Okta organization.
Example:
If your browser displays:
https://your-company-admin.okta.com
remove the “-admin” portion when providing the domain to Lative.
Once you have collected the required values, provide the Client ID, Client Secret, and Okta Domain to your Lative representative or support contact to complete the SSO configuration.
After the configuration has been completed, assigned users will be able to securely sign in to Lative using their Okta credentials through Single Sign-On (SSO).s and minimal manual configuration
SP-Initiated SSO
Lative supports Service Provider (SP)-initiated Single Sign-On.
To test SP-initiated authentication:
- Navigate to the Lative login page:
https://app.lative.ai/login - Enter the email address associated with your organization’s Okta account.
- Click Continue.
- Lative will automatically redirect the user to Okta for authentication.
- After successful authentication in Okta, the user is redirected back to Lative and granted access.
If authentication fails, verify:
- User assignment in Okta
- Metadata URL configuration in Lative
- User email domain configuration
Troubleshooting
Common Issues
User receives “Application not assigned” Verify that the user or group has been assigned to the Lative application in Okta.
Login Loop Verify that the correct metadata URL has been configured and that the metadata is accessible.
Support
For assistance with Lative SSO configuration:
Email: su*****@****ve.ai Website: https://lative.ai